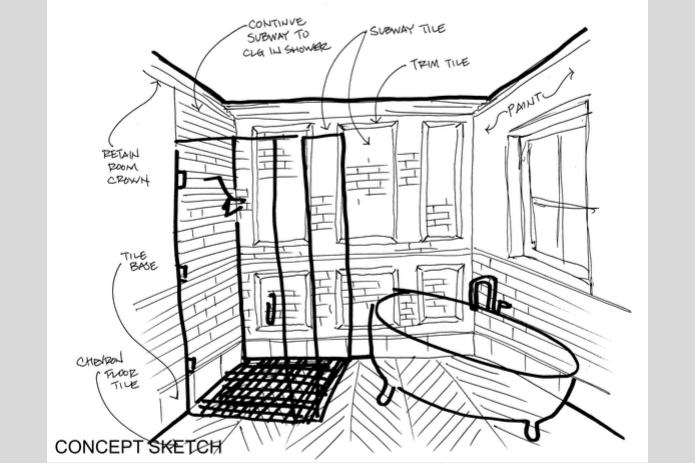
Concept Sketch by David Reed
“Most people make the mistake of thinking design is what it looks like. People think it’s this veneer – that the designers are handed this box and told, ‘Make it look good!’ That’s not what we think design is. It’s not just what it looks like and feels like. Design is how it works.” — Steve Jobs
Steve Jobs had is right. Design is so much more than what it looks like. Design has to start with how it works. Before the “pretty” has to come the prep. Otherwise it’s not worth doing.
Unlike many interior design firms, we have a designer on our team, David Reed, who is dedicated to the prep, or what we call in the industry, the interior architecture of a space. David makes sure our designers all have a perfectly functional and intelligent foundation on which to build our designs.

David Reed | Photo by Suzy Gorman
In Part 3 of our Design Process Series, I’d like to walk you through what it took to get from Site Survey to Final Photo for a recent master bath renovation.
STEP 1: THE SITE SURVEY
First things first, and that means figuring out where we are in order to know where we want to go. Before he can begin creating a new space, David visits the site, takes a site measure and creates a hand sketch of the field dimensions. Back at the office, David determines with the designer on the project, the FF&E (furniture, fixtures & equipment), requirements and an inventory of the FF&E to be reused.
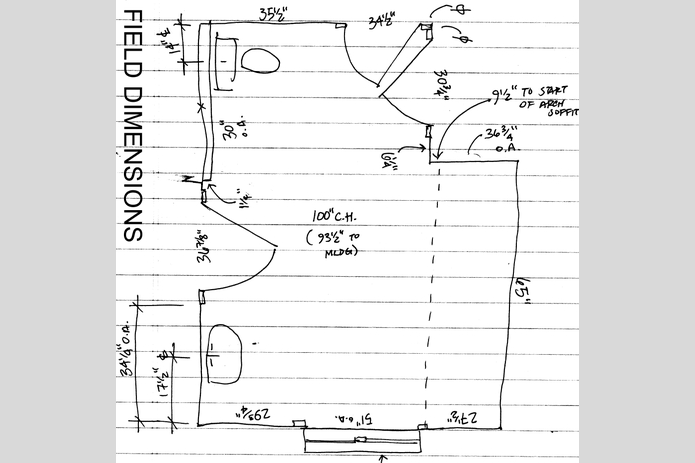
Field Measurements
STEP 2: THE DRAWINGS
Based on his measurements, David creates a Base Plan drawing of the existing site conditions using our Revit computer-aided drafting system. Sometimes, he also creates a hand drawn conceptual sketch of the space to illustrate options that would take too long to create in Revit. This is what he did for our client’s master bath in order to illustrate a rather complex tile pattern on the wall.
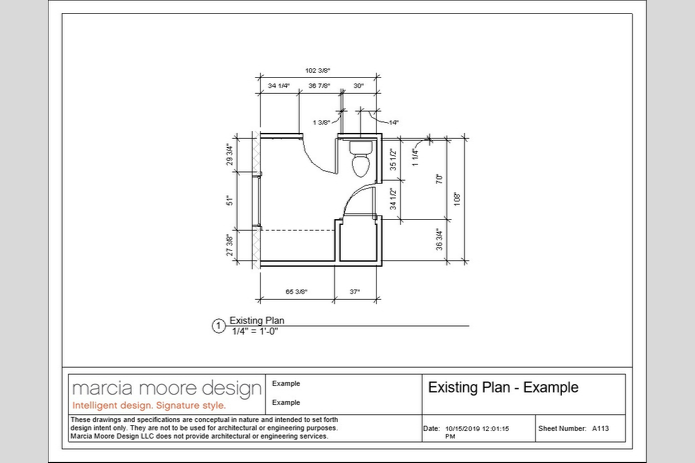
Base Plan
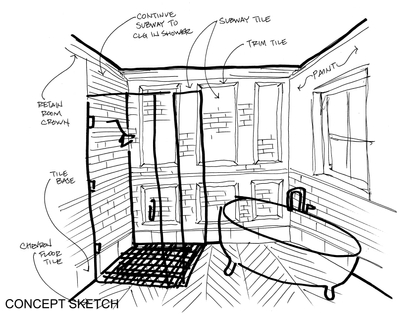
Concept Sketch
STEP 3: THE PROPOSED PLAN
Next, David creates a Proposed Plan in Revit based on the requested interior changes. This drawing can include space and floor plans, elevations, preliminary furniture and cabinetry placement and finishes, plumbing fixtures and placement, flooring and lighting. If the project requires detailed elevation plans, such as electrical or tile, these drawings are also created at this time.
David reviews the Proposed Plan with the interior designer who reviews the Plan and makes any necessary tweaks or revisions, which David implements in a new Revit drawing. For our client’s master bath, minimal changes were made to the Proposed Plan.
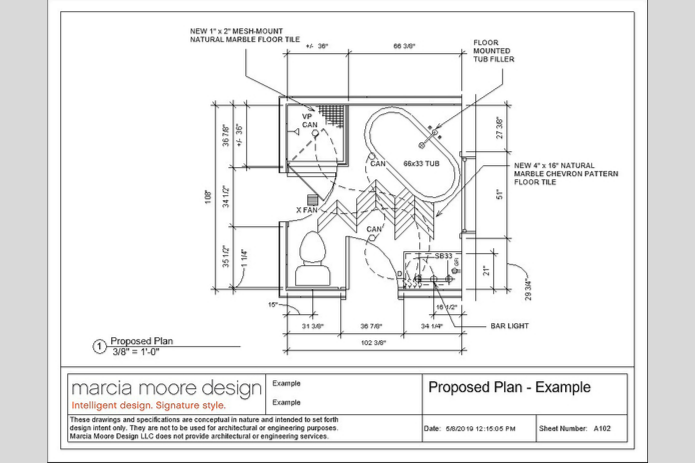
Proposed Plan
STEP 4: PRESENTATION TO CLIENT
At this point, we are ready to present our Proposed Plan to the client. In addition to the Proposed Plan, any detailed elevation plans, such as the Tile Elevation shown below, are also presented.
Upon the client’s approval, David documents all details of the work to be completed, including millwork specifications and finishes, plumbing fixture selections, flooring, tile, paint colors, lighting plans, plumbing location, installation instructions and electrical layouts.
If the client has requested a 3D model view and/or rendering, David will create and present these documents with the Proposed Plan.
Proposed Plan
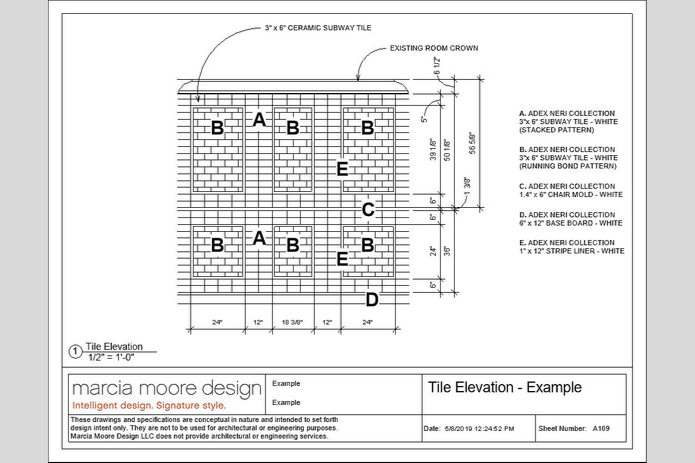
Tile Elevation
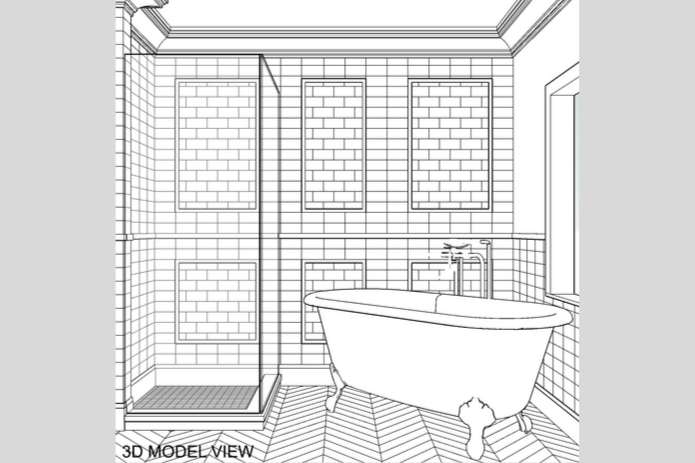
3D Model View
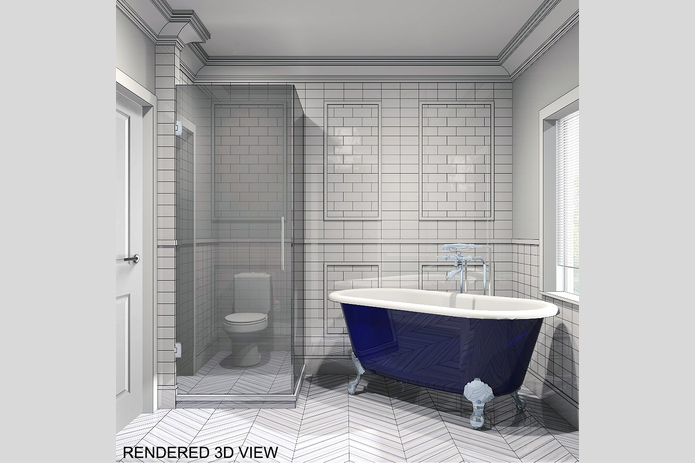
Rendered 3D View
GOOD TO GO
After the client has approved the Proposed Plan and any renderings, we issue the completed construction documents to the client’s contractor, and the fun begins!
FINAL PHOTO
After all work has been completed, it’s photo shoot time! Here’s the big reveal of our client’s master bath.
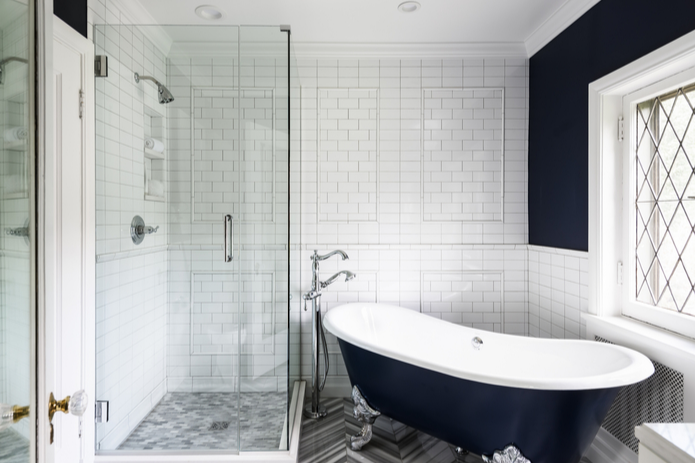
Designed by Karen Korn (formerly with Marcia Moore) and David Reed | Photo by Karen Palmer
Hopefully we’ve shed some light on the importance of this very first part of the Design Process. It’s definitely a part of the process that can’t be ignored. Don’t forget to make it part of yours!
Until next time,

Some More Posts You Might Enjoy!
CLICK IT to PIN IT